This blog will explore some of BIM 360 Docs powerful features with additional features to be discussed in a future blog.
One thing to initially understand about BIM 360 Docs is that it contains two distinct, and separate sections; “Plans”, and “Project Files”.
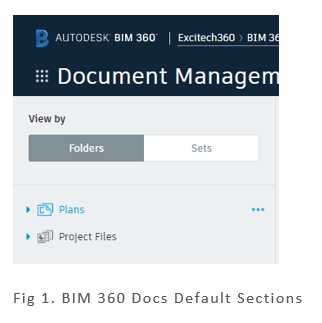
In the first instance, there are separate lists of supported file types for each section; In turn, each of the supported files types in the “Plans” section are treated very differently than if they were loaded into the “Project Files” section.
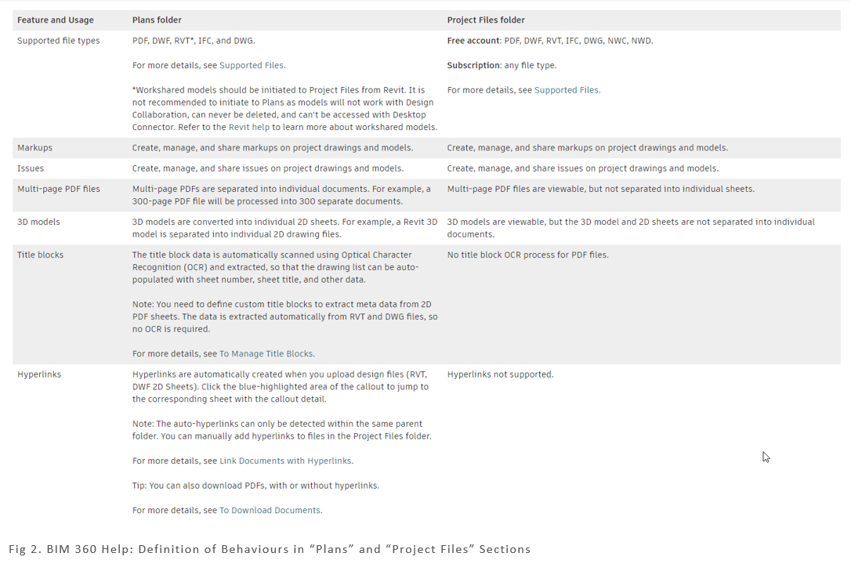
To summarise the image above, multi-page PDFs, Revit models, DWG and DWF drawings are extracted into individual files in the “Plans” section but are displayed as single files in the “Project Files” section.
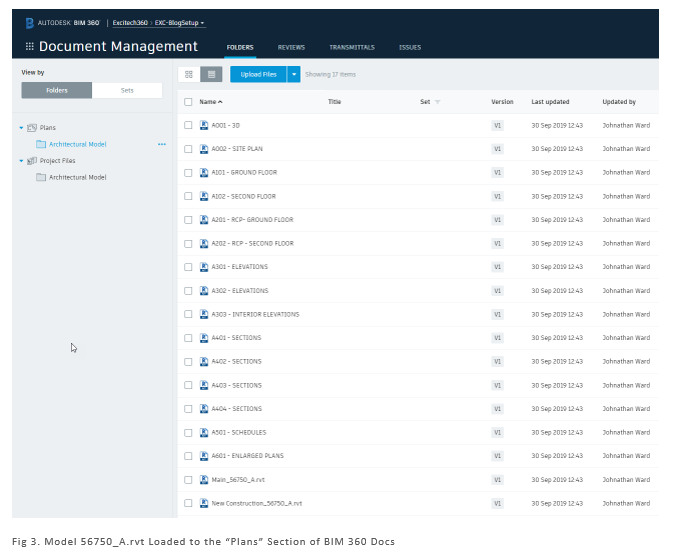
Here, the model is saved into the “Plans” section and the individual views and sheets specified by the current “Publish Set” are extracted and displayed as though they were individual files.
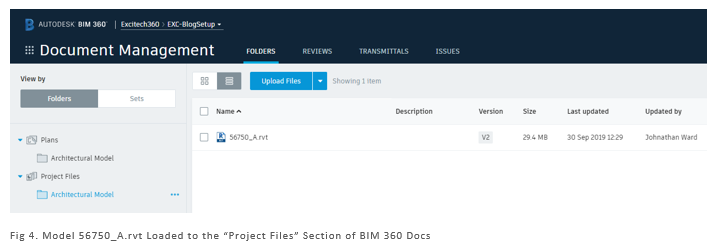
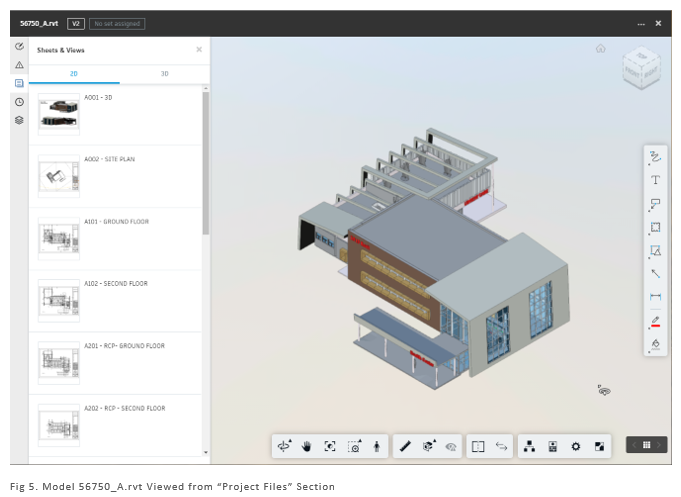
Now, the model is saved into the “Project Files” section, with the same current “Publish Set”, but here the model is displayed as a single file; the individual sheets and views being available when the file is selected for viewing.
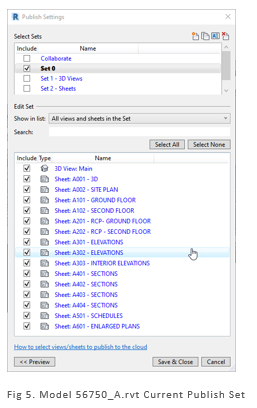
The publish set is established from within the Revit model, located in the “Collaborate” tab on the ribbon.
Appreciation of these differing behaviours between the sections can help us decide how best to use them. With that in mind, there is another significant difference to understand; the behaviour of PDFs loaded into each section.
Load a PDF into the “Project Files” directory and the file will simply be displayed “as is”. Now this is ideal if we are loading a specification document, for example, but if this is a PDF of a drawing, then BIM 360 Docs offers us an alternative; to extract information (via OCR) directly from the Title block contained in the PDF. This requires the PDF to be loaded into the “Plans” section of BIM 360 Docs. A small amount of configuration is required to achieve this; namely, creating some custom attributes in BIM 360 and defining the areas on the title block that contain this metadata.
Additional attributes are best defined at the root level of the “Plans” section; this will allow them to propagate through to all folders and sub-folders. The order of the attributes can also be adjusted to suit.
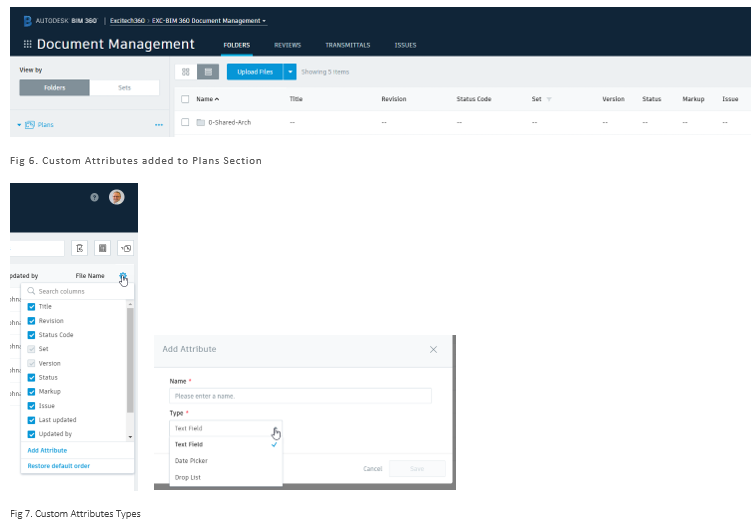
Attributes can be defined as either text, date, or list, though text is best suited for extracting title block metadata.
Each title block type then needs to be defined. This can be done during the upload of drawings, but I prefer to store and define them first; simply load a sample title block into the “Plans” section (I have created a separate folder for mine) and you are prompted to define the area of the title block that matches each piece of metadata that you wish to extract.
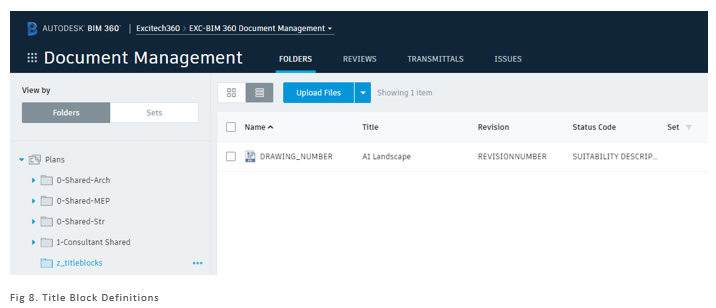
You are prompted to define the overall area containing the metadata, and then to define specific areas for each piece of metadata.
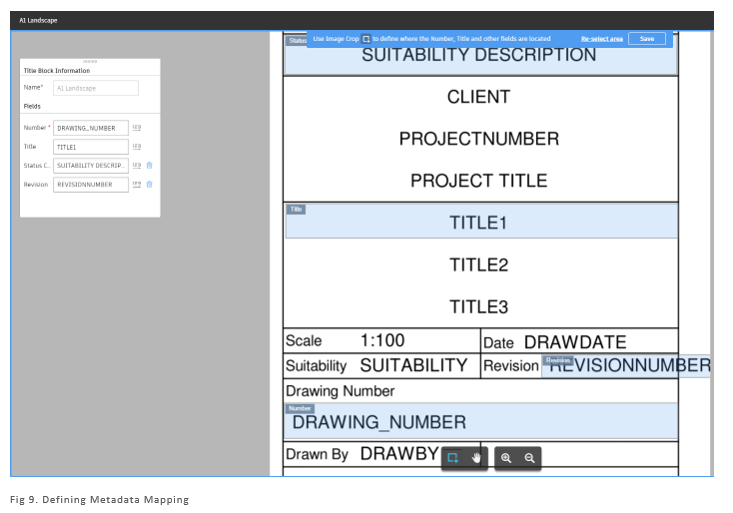
Whenever a PDF file is loaded into the “Plans” section, you are prompted to select a specific title block template to use (or to define one, if required), and BIM 360 Docs will then extract the metadata from each drawing title block.
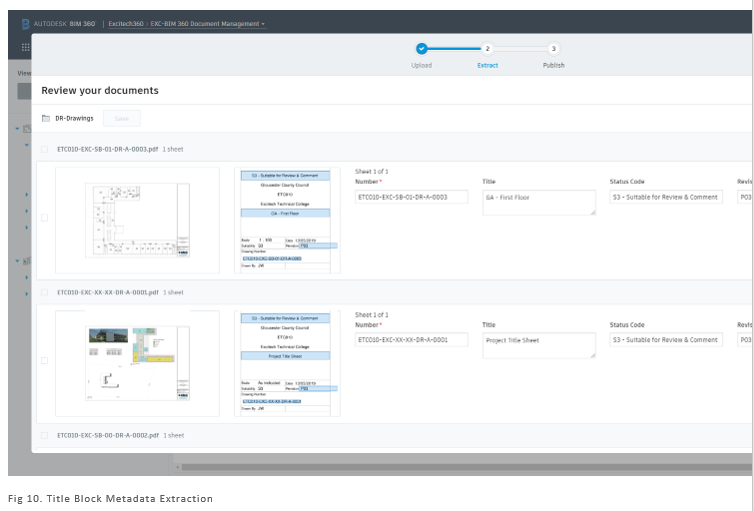
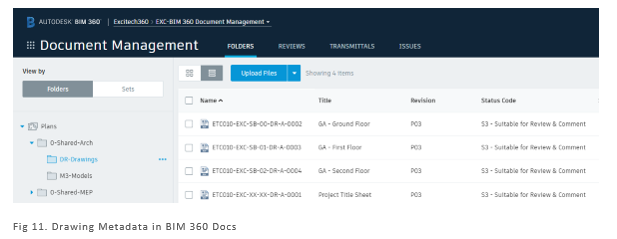
Once the extraction is completed, the information is displayed against each drawing.
I will be exploring more functionality in future blogs, but it you would like to know more information on Autodesk BIM 360 Docs, please visit our webpage: https://www.symetri.co.uk/en/Products/BIM-360-Docs


