Autodesk provides free licences to their software for authorised education users, such as students and educators. To access these licences, educators are required to get their accounts verified by Autodesk for educational use. This blog will detail the steps involved in verifying your access.
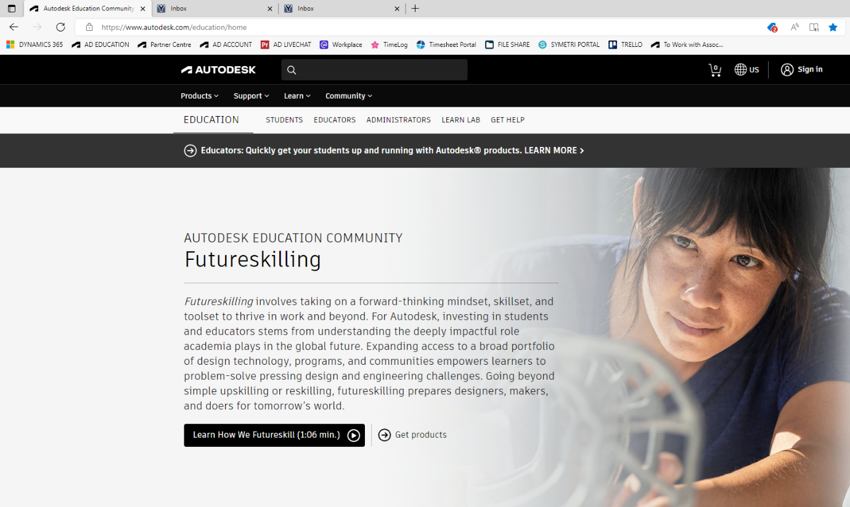
Firstly, in your browser, go to https://www.autodesk.com/education/home
Next, navigate to the ‘Get Products’ link and press this. If you have already created your Autodesk Education account, press sign in. If not, you need to press the Get Started button to be directed to the Create Account button, where you must create your Autodesk for Education Account. Please use your full legal name here and no short names (e.g., Will if your name with your school is William).
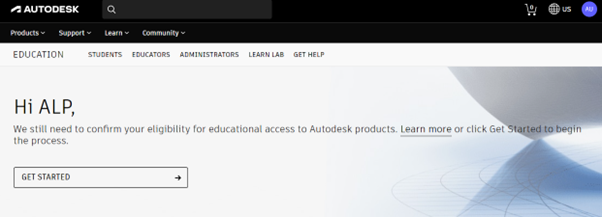
Once your account has been created, you must verify your educator status with Autodesk. You can see if you are unverified when you sign in, as Autodesk will tell you they still need to confirm your eligibility. To verify your access, press the Get Started button, which will take you to the verification document page.
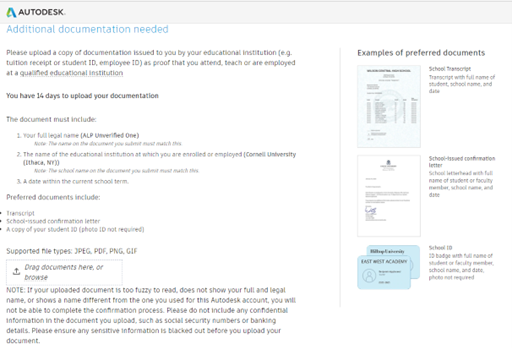
You must upload your verification document to get your account approved by Autodesk’s checking software Sheer ID. You need to upload a verification document to prove you should have access to the education resources.
This document must contain:
- Your full legal name (must be the same on the account and the documentation you submit)
- The name of the educational institution at which you are enrolled or employed (The school’s name on the document you submit must match this)
- A date within the current school term.
 Then press submit and await an email in your inbox accepting or rejecting your verification. If the verification is rejected, you should be given some indication as to why this was denied, and you will be allowed to try to verify again via the link in the email. An educator or student has 14 days to complete verification before the process times out, so these steps must be carried out within those 14 days.
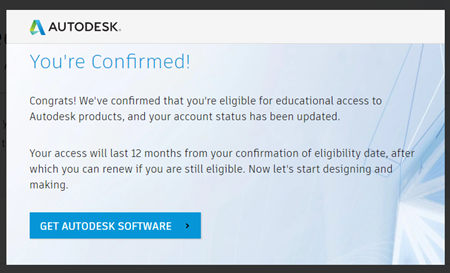
Once sufficient evidence has been submitted and passed the Sheer ID verification process, you will get an email confirming your account has been verified. This verified access is available for 1-year and must be reverified after the 1-year mark to prove that your account is still in education. Educators will be given an email notification 90 days, 60 days and 30 days before the access will time out. Student accounts will receive a notification email 30 days before their access ends so they can re-verify their access.
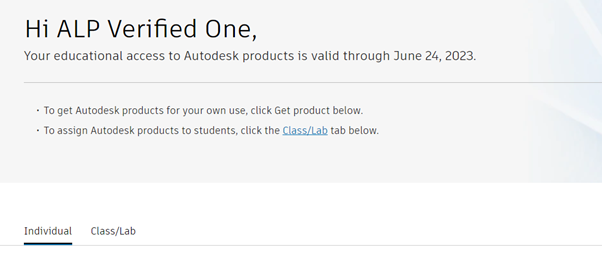
Once you receive the confirmation email, go to https://www.autodesk.com/education and sign in either in the top right-hand corner or by pressing Get Products, then Sign in. You will be greeted with a pop-up that confirms your access.
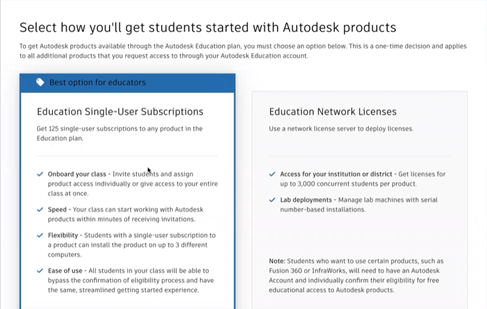
The first time an educator signs in, there will also be a pop-up asking if you want a single-user or network licence. Each has pros and cons, which are listed in detail on the pop-up. The recommendation would be to go for single-user licences as they can be managed more easily. It is essential to properly read this step and make an informed decision, as once you have selected which type of licence you want, you cannot change this.
In this example, we have selected single-user licences, and when we press submit, we can then collect our licences for the products we want to use. An educator can see an Individual Tab and a Class/Lab tab on their login. They need to ensure they are in the Class/Lab tab for anything where they want to give their class access. The individual tab is for any individual licences an educator may want to use but not share with the class. Suppose a student wants their own individual access to a product that their educator didn’t manage. In that case, they can verify their account and press Get the product on their Individual tab within the www.autodesk.com/education website.
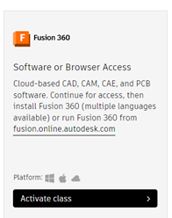
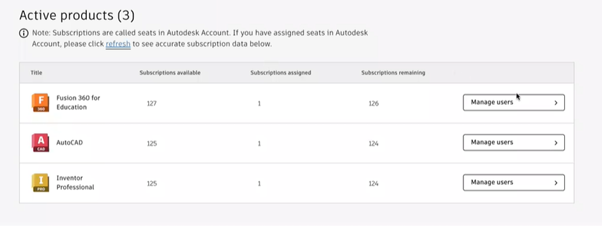
To set up your Class/Lab, you must collect and assign the licences. Select the Class/Lab tab, navigate to Fusion 360 and press the Activate Class button. This will then bring up a pop-up which asks if you want to get your 125 paid for licences, which you would press confirm to accept. This then assigns you 125 licences to manage as an educator.
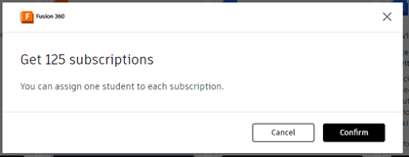
Another pop-up will let you know that this can take up to a few hours to populate, which can often be the case. Once your licences have been assigned to you, they will show on the main page when you sign in to Autodesk.com/education and will be managed from here.
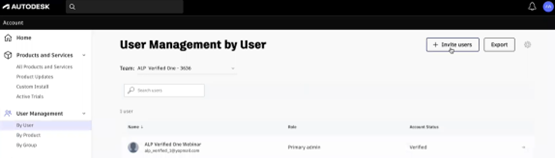
Navigate to Fusion 360 for Education and select Manage users. Or you can navigate to your initials in the top right corner > Account > User Management > By User. You first need to invite the users by pressing Invite users in the top right corner.
 You can invite a single user or bulk import using a CSV file. The naming should be First Name, Last Name and then email address. Again, using the student’s full name in this area is essential.
This will notify the students, letting them know they have been invited to use the products.
 Then, Navigate to the By Product page by clicking Account > User management > By product and selecting Fusion 360. Here, you will be able to press Assign Users, and this will pull up any users that have been added. Please note that the students may need to accept the invitation before you can assign products to them.
The students you have added may show in the drop-down list, or you may need to search for their names/email addresses.
You can assign or unassign a product from a user at any time. This may be helpful if only certain students use the software at certain times during the school year.
Then, all you need to do is decide how to use the software; it can be accessed on the web client here: https://fusion.online.autodesk.com or downloaded onto a Windows or Apple Mac computer. The software can be downloaded from the Autodesk education website; after signing in, you can go to Account > Products and Services > Fusion 360 > Download.
To learn more about the Autodesk Education Verification Process, feel free to contact us to arrange a consultation with one of our specialists by filling in the form.

