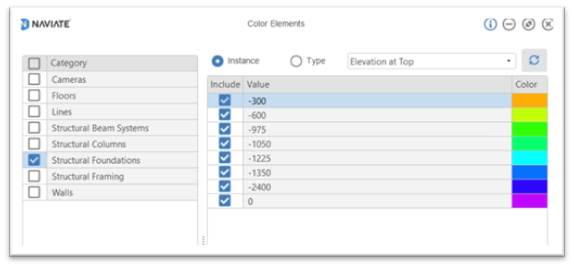
 Firstly, click on the Colour Elements tool on the Naviate Accelerate ribbon, in the dialog box you see a category list down the left side, place a tick in the structural foundations category. Then from the parameter dropdown select ‘Elevation at Top’, this will propagate the values with the level heights of the top of the pile caps and define a colour. The colours can be changed at this point if desired, by clicking on the colour down the right side and choosing a new colour.
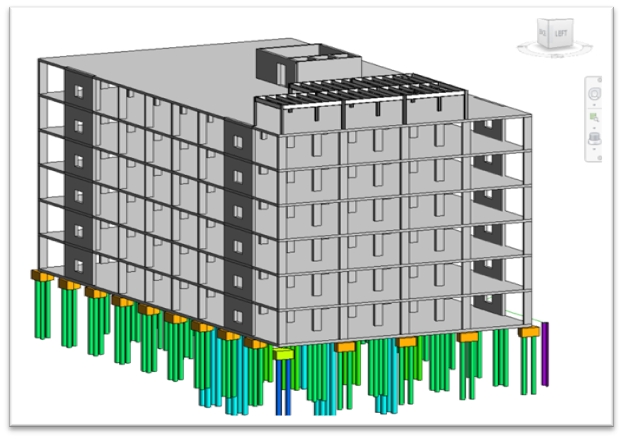
With the colour elements dialog box still open, you can click into your model view, the colours will now be visible and thus indicating the height at the top of each pile cap. If you can see any pile caps with a different colour, these will be at a different height, and they might need to be adjusted.
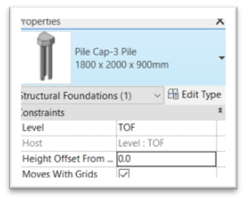
By selecting the pile cap that is showing a different colour and checking the properties, for example the level offset could be changed.

Once you have corrected or changed any differences in your pile cap heights you can go back to the still open colour elements dialog box, there you will see a refresh button just above the colour column. Using this will refresh the values and colours.

Again, click back in the model view to see the refreshed colours.
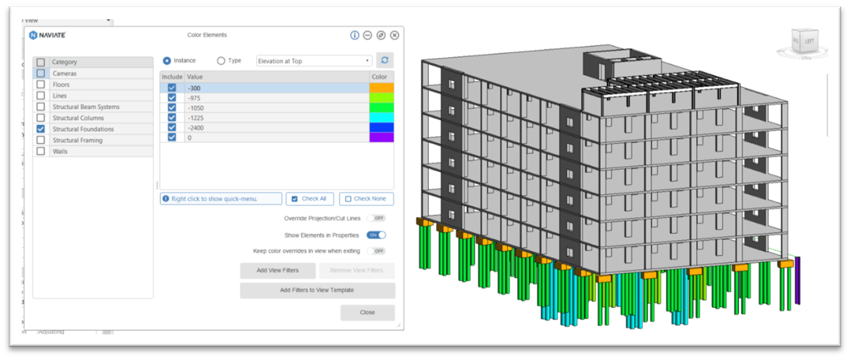
Once the colour elements dialog box is closed the colour overrides are lost but if you wish to keep the colours before you exit the dialog box, select ‘Keep colour overrides in view when exiting’ which will retain the colour overrides in that view.
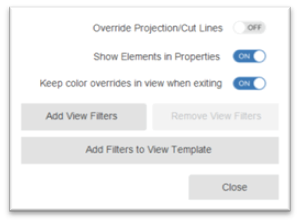
There is also an option to create view filters and one to add them to a view template.
Setting up view filters can be a time-consuming process, but Naviate Colour Elements can do this with a one-click button that will generate the view filters based on the category, parameter values and colours you just set up.

To learn more about Naviate, visit our product page, or call us on 0345 370 1444 or email info@symetri.co.uk.


 Firstly, click on the Colour Elements tool on the Naviate Accelerate ribbon, in the dialog box you see a category list down the left side, place a tick in the structural foundations category. Then from the parameter dropdown select ‘Elevation at Top’, this will propagate the values with the level heights of the top of the pile caps and define a colour. The colours can be changed at this point if desired, by clicking on the colour down the right side and choosing a new colour.


