You have just been passed a Revit model of a kitchen or similar wall storage system and would like to turn it into a fully detailed manufacturing assembly that can be used for manufacture. But a typical scenario that seems to crop up time and time again, is when to stop using Autodesk Revit and start using Autodesk Inventor. It’s essential to use the right tool for the job.
Architects and Manufacturers are like Ying and Yang. The challenge is with manufacturers who like to show every hole, screw, hinge, handle in full detail including construction jointing, whereas the Architects will simply display the form and aesthetic appearance as you can see in figure 1.
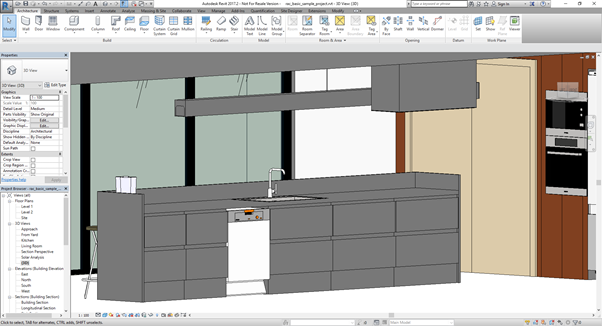
Figure 1 Revit Model
One solution would be to redraw everything from scratch in Autodesk Inventor, but this is time consuming and would be error prone.
This is where a very cool piece of technology called iBox which has been included with the Woodwork for Inventor software can be useful. This is just a small part of the power of this package when it comes to detailing cabinets.
Let’s take a look at the process. Firstly, you need to design your template carcass the way you would like it manufactured within Autodesk Inventor. This can then be authored to enable automatic placement within the Inventor assembly. If you would like to try this out, there are a number of templates already available within the sample area of the Woodwork for Inventor software that you can use to get the idea.
You can then simply open the Revit model inside Autodesk Inventor. It’s a good idea to remove any unnecessary Revit elements and saving a version for downstream use.
The task is to populate the voids below the worktop where the cabinets would take up position, as you can see in Figure 2.
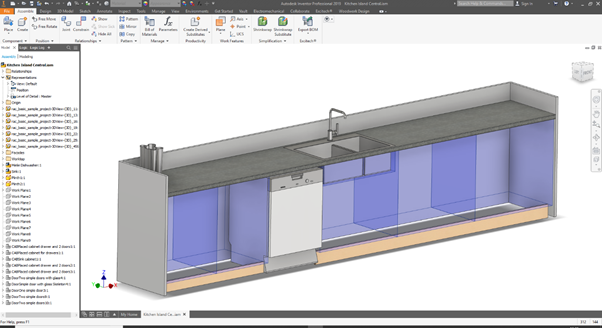
Figure 2
We can simply take the authored cabinet, and the software will automatically prompt for a solid body to highlight, see yellow dotted box in Figure 3. Simply select this box that was imported from Revit. By selecting the TOP, FRONT and RIGHT-hand face, the cabinet will size itself perfectly within the space in width, height and depth.
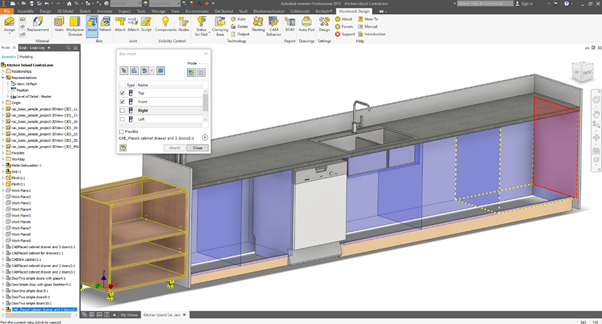
Figure 3
These cabinets will be linked to the box size, and should this change, the iBOX cabinet can regenerate to make the necessary changes.
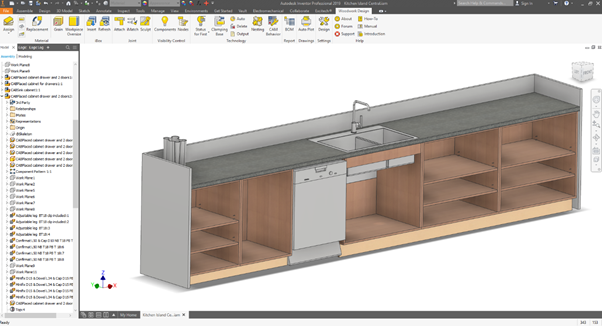
Figure 4
It literally takes less than a few minutes to place all the units into the model. You can of course pattern your cabinets or copy them using standard Inventor commands if necessary. Different door styles can also be placed in the same way, as well as standard drawer boxes with drawer fronts.
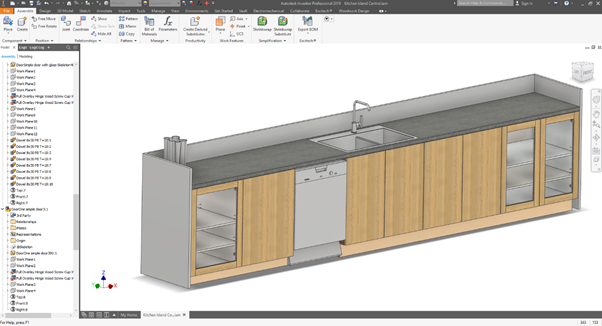
Figure 5 - Finished Inventor Assembly
When authoring your template you can add Inventor’s rules-based design tool iLogic to control the handling of the hinges with cut-outs, the number of shelves, handle positions and more.
For those that have CAD CAM software, you will have access now to all the information required to manufacture your parts.
If you want to learn more about different workflows, interoperability and what’s possible when using Autodesk Revit and Autodesk Inventor software, then please contact us

